Click the Student Maintenance Quick Access Button on the Navigation Bar.
The Student Maintenance Screen will appear.
Select Item: Begin typing the Student's name or ID. The system will search and a list will display in the Drop Down List Box. Select the student whose record you want to access.
The Student Record will display.
Click the Demographics Tab.

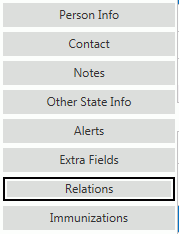
Click the Relations Tab.

Click the Address Tab.

Click  next to the Addresses Grid.
The Address Form will appear.
Input specifications are as follows:
You may  and
and  the
Address from another Record. If you use
this option, the Relations' Addresses will be linked and any change you
make to one will change the other(s).
Address Type: Use the Drop Down List Box or type to enter the Address Type.
Line 1-3: Enter the address in the lines provided.
City: Enter the City.
State: Enter the State.
Zip: Enter the Zip Code.
Zip Plus Four: Enter the last 4 digits of the Zip Code.
Apartment: Enter an Apartment Number, if applicable.
Country: The system defaults the Country to US. However, you may use the Drop Down List Box or type to change the Country, if necessary.
Is Default: Check the Check Box if this is the address to be used as the Relation's default address. NOTE: If this relation is the student's Primary Contact, the Is Default Check Box MUST be checked for the system to use this address for the Student.
NOTE: To assign a person to a student as the Primary Contact, you must have selected Parent Legal Guardian OR Has Custody AND Access to Records in the Relations Tab/Relationships Grid. To view documentation on How to Add a Relationship for a Student, click here.
NOTE: If the student does not have Contact Information entered into their Contact Tab, the system will use the Primary Contact's information to populate fields in the student's Contacts Tab.
Click  the Address.
Click  to
save the Address and add another.