
Click the Relationships Tab.
The Student's relations will display in the Student Relationships Grid at the top of the screen.
To view documentation on How to Edit a Relationship Record, click here.
To view documentation on How to Delete a Relationship Record, click here.
To verify/update a Student Relation, select
the Relation from the Student Relationships Grid. The selected Student
Relation is highlighted in blue. Click the Person Info Tab.
If the Student's Primary Guardian has Added a New Relation in the Student Records Portal application, the system will prompt you to verify if the Relation is new or an existing person already in the database. (If this step does NOT display for the Relation, simply continue verifying the Relation data as previously described.)

To determine if the Person is existing or new,
click in the Person Field and begin typing their last name. If the Relation
already exists in the database (i.e., displays in the drop down list box),
select the appropriate Person, and then click  .
.
If the Person is New and does NOT already exist in the database (i.e., does NOT display in the drop down list box), check the Confirm New Person Check Box. Note: We recommend you perform a search using the steps described above before confirming the Person as new.
Verify the data in each field is correct for the Relation.
If a field is blank or needs to be changed, input specifications are as follows:
Title: Enter the Person's Title (i.e., Miss, Mrs., Mr.).
First Name: Enter the Person's First Name. This is a required field.
Middle Name: Enter the Person's Middle Name.
Last Name: Enter the Person's Last Name. This is a required field.
Suffix: Enter the Person's Suffix, if applicable. (i.e., Jr., Sr.)
Alternate First Name: Enter the Person's Alternate First Name, if applicable.
Alternate Last Name: Enter the Person's Alternate Last Name, if applicable.
Date of Birth: Enter the Person's Birth Date.
Gender: Use the Drop Down List Box to enter the Person's Gender. The system defaults to Unknown.
SSN: Enter the Person's Social Security Number.
Hispanic Latino: Check the Check Box if this Person is of Hispanic Latino descent.
Primary Race: Use the Drop Down List Box or type to enter the Contact's Primary Race.
Races: Check the Check Box(es) if other races apply.
Employer Name: Enter the Employer Name.
Language: Use the Drop Down List Box or type to enter the Person's primary language.
Click .
Select the Address Tab. 
The Employee Address column will be checked if the Relation is an employee and the address was populated from that record.
The From Submission column will be checked if the address was populated from the Student Records Portal application or API Record Submission.
The From Person column will be checked if the address was populated from the Relation's record already in the database.
Click  next to the Addresses Grid
if you need to add an address.
next to the Addresses Grid
if you need to add an address.
Select the address, and click  if you need to edit an address.
Select the address, and click  if you need to delete an
address.
if you need to delete an
address.
Select the Phone Tab. 
The Employee Phone column will be checked if the Relation is an employee and the phone number was populated from that record.
The From Submission column will be checked if the phone number was populated from the Student Records Portal application or API Record Submission.
The From Person column will be checked if the phone number was populated from the Relation's record already in the database.
Click next to the Phones Grid
if you need to add a phone number.
Select the phone number, and click if you need to edit a phone
number.
Select the phone number, and click if you need to delete a
phone number.
Select the Email Tab. 
The Employee Email column will be checked if the Relation is an employee and the email was populated from that record.
The From Submission column will be checked if the email was populated from the API Record Submission.
The From Person column will be checked if the email was populated from the Relation's record already in the database.
If
the Relation already has a Relation Record in the database that includes
an email(s), 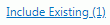 will display. Click and
the system will populate the email(s) from the existing record. Then,
you can verify/update the email(s) as needed.
will display. Click and
the system will populate the email(s) from the existing record. Then,
you can verify/update the email(s) as needed.
Click next to the Emails Grid
if you need to add an email.
Select the email, and click if
you need to edit an email.
Select the email, and click if
you need to delete an email.
Next you will need to move to the Documents Tab.
To view documentation on the Documents Tab, click here.