
The Student Roster Report allows you to print Student data that includes their demographic, entry/exit, site, grade, and transportation data for the selected student(s) by the selected Begin/End Session or Date Range.
Click the Options Menu, verify the correct School Year and Site are selected.

Then click State Reports, Student Roster.
To view documentation on How to Use the Student Selector, click here.
Input specifications are as follows:
Begin Session: Use the Drop Down List Box or type to enter the Session for which you want the Student Roster to begin.
OR
Begin Date: The system defaults the Begin Date to the first day of the current fiscal year. However, you may use the Drop Down Calendar Box or type to change the begin date for the Student Roster.
End Session: Use the Drop Down List Box or type to enter the Session for which you want the Student Roster to end.
OR
End Date: The system defaults the End Date to the last day of the current fiscal year. However, you may use the Drop Down Calendar Box or type to enter the end date for the Student Roster.
Note: Only students who have an entry date and/or exit date that falls in the Session and/or Date Range entered will print on the report.
Click  to export the report directly to PDF Format in order to save/print the
Student Roster.
to export the report directly to PDF Format in order to save/print the
Student Roster.
Click 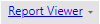 to open the Report Viewer options.
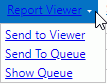
Click Send to Viewer to send the report to Report Viewer where you can save/print the Report in various formats.
Click Send to Queue to queue the report and open the Report Queue. (Note: When you send a report to queue, you do not have to wait for the report to finish processing in order to start another report or work somewhere else in the application.)
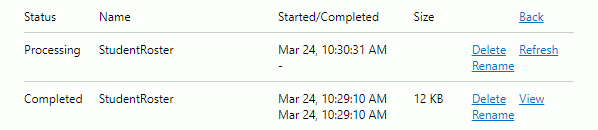
The last report sent to the Report Queue will be listed as the first item in the Report Queue. All other reports sent to the Report Queue will also be listed in Started order.
Status: Processing
If the Status is Processing, the User can Delete, Rename or Refresh the report.
Status: Completed
If the Status is Completed, the User can Delete, Rename or Review the report. If you select Review, the report will be sent to the Report Viewer.
Click  to
go back to the Student Roster Form to print another report. Click
to
go back to the Student Roster Form to print another report. Click  to
exit the Student Roster Form and continue working within the application.
to
exit the Student Roster Form and continue working within the application.
You can navigate to the report at any time and click Show Queue to view the Report Queue, check the status of the report, and use the options listed above.
Click 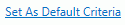 to save the criteria entered as the default for the Student Roster.
If
you have Default Criteria set, click  if you want
to clear those settings.
if you want
to clear those settings.