Activity Fund – Accounts Payable
End of Year Closing
Procedure and Records Retention
1. Data to verify
– Accounts Payable
Unpaid Encumbrances
NOTE: Check
for any unpaid purchase orders that will not be used and close them, if
necessary, and rerun the report. If applicable, close any outstanding
purchase orders in the current year that still need to be paid and enter
in the new year.
i-AP/Options/PO Reports/Unpaid
Encumbrances
A. Select the appropriate
Cash/Activity Fund.
B. Enter 6/30 for the As
of Date.
C. Check the Print Payroll
POs box.
D. Leave the Include Only
Certified box and Print Detail box blank.
E. Print and Save the Report.
F. Print for all Cash/Activity
Funds.
G. Close all applicable
unpaid purchase orders that will not be used and rerun the report, if
necessary.
2. Tasks to perform
– Accounts Payable
Perform Edit Checks
Use the Perform Edit
Checks tool to correct any potential coding issues prior to uploading
a trial submission of the data to OCAS. If there are errors, correct them
before proceeding.
i-AP/Options/Tools/Perform
Edit Checks
A. Leave the Classification
Bolding Selection set to STATE.
NOTE:
As needed, make any necessary corrections to the STATE bolding criteria
in order to stay current with reporting requirements. (Options/Setup/Classification
Bolding)
B. Check the appropriate
Edit Checks box to apply the current fiscal year edit checks.
C. Click Perform Checks.
D. Click the Export icon
to export the results to PDF and print the report. Correct errors as necessary.
Oklahoma Expenditure
Reporting Trial Submission
NOTE:
Verify the Oklahoma Expenditure Report does not contain negative errors
(the text will be red in the report if negative). If there are errors,
correct them before proceeding. It is important to upload a trial submission
of the data to OCAS in order to correct any coding issues before printing
final state reports.
i-AP/Options/Federal/State
Reports/Oklahoma Expenditure Reporting
A. Enter appropriate Cash/Activity
Fund.
B. Enter the Payment Date
of 6/30 or final payment date to include all expenditures for the fiscal
year.
C. Enter the File Name.
D. Print the Report and
check for errors. Correct errors as necessary.
E. Click Create File and
save file for testing. Upload the file to OCAS and correct errors as necessary.
REMINDER: Do not submit reports to the auditor until completely
verified/balanced in all applications. Make sure to keep copies for the
district and auditor, then create OCAS files for state financial reporting.
IMPORTANT: DO NOT ADD OR EDIT ANY DATA AFTER REPORTS ARE CREATED
AND SENT TO THE AUDITOR.
3. State Reports
to verify and print – Accounts Payable
In
addition to a hard copy of the reports required by State Statute, the
Board of Education and Auditor, it is important to also save a PDF digital
copy of these reports.
For
records retention at your district, a historical folder should be created
locally for storage of the current school year’s digital copies. This
will provide your district an easy way to reference this historical information
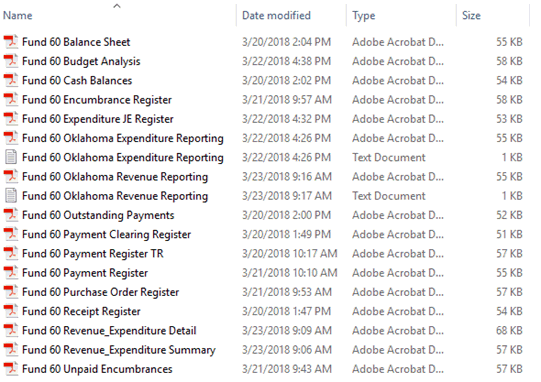
in the future. See ‘Example of Historical folder’ on last page. IMPORTANT:
The historical folder should be secured by the network administrator,
giving access only to the appropriate users.
NOTE: Run each report
for all applicable funds.
Purchase Order Register
i-AP/Options/PO Reports/Purchase
Order Register
A. Select the appropriate
Cash/Activity Fund.
B. Enter 7/1 for the Begin
Date and 6/30 for the End Date.
C. Check the Print Payroll
POs box.
D. Click Print to export
the Purchase Order Register to PDF. Print and retain for records.
E. Save the PDF to the
current year’s historical folder using the file name: Fund XX Purchase
Order Register (i.e., Fund 60 Purchase Order Register).
F. Print for all Cash/Activity
Funds.
v The Purchase Order Register
should balance to the Encumbrance Register.
Encumbrance Register
i-AP/Options/PO Reports/Encumbrance
Register
A. Enter 7/1 for the Begin
Date and 6/30 for the End Date.
B. Check the Print Payroll
POs box.
C. Leave the Print Detail
box blank.
D. Select the appropriate
Cash/Activity Fund. Make sure
to print each Fund separately.
E. Click Print to export
the Encumbrance Register to PDF. Print and retain for records.
F. Save the PDF to the
current year’s historical folder using the file name: Fund XX Encumbrance
Register (i.e., Fund 60 Encumbrance Register).
G. Print for all Cash/Activity
Funds.
v The Encumbrance Register
plus the Expenditure JE Register should balance to the Encumbered Total
column on the Budget Analysis.
v The Encumbrance Register
should balance to the Unpaid Encumbrance Register Total plus the Payment
Register Total.
v The Encumbrance Register
should balance to the Purchase Order Register.
Unpaid Encumbrances
i-AP/Options/PO Reports/Unpaid
Encumbrances
A. Select the appropriate
Cash/Activity Fund.
B. Enter 6/30 for the As
of Date.
C. Check the Print Payroll
POs box.
D. Leave the Include Only
Certified box and Print Detail box blank.
E. Click Print to export
the Unpaid Encumbrances to PDF. Print and retain for records.
F. Save the PDF to the
current year’s historical folder using the file name: Fund XX Unpaid Encumbrances
(i.e., Fund 60 Unpaid Encumbrances).
G. Print for all Cash/Activity
Funds.
v The Unpaid Encumbrance
should balance to the Encumbered Balance column on the Budget Analysis.
Expenditure JE Register
i-AP/Options/PO Reports/Expenditure
JE Register
A. Select the appropriate
Cash/Activity Fund.
B. Enter 7/1 for the Begin
Date and 6/30 for the End Date.
C. Click Print to export
the Expenditure JE Register to PDF. Print and retain for records.
D. Save the PDF to the
current year’s historical folder using the file name: Fund XX Expenditure
JE Register (i.e., Fund 60 Expenditure JE Register).
E. Print for all Cash/Activity
Funds.
v The Expenditure JE Register
plus the Payment Register should balance to the Paid column on the Budget
Analysis.
Payment Register
i-AP/Options/Payment
Reports/Payment Register
A. Select the appropriate
Cash/Activity Fund.
B. Enter 7/1 for the Begin
Date and 6/30 for the End Date.
NOTE: If
you dated payments after 6/30 make sure to extend your End Date to include
them.
C. Check the Print Payroll
Payments box.
D. Click Print to export
the Payment Register to PDF. Print and retain for records.
E. Save the PDF to the
current year’s historical folder using the file name: Fund XX Payment
Register (i.e., Fund 60 Payment Register).
F. Print for all Cash/Activity
Funds.
v The Payment Register
plus the Expenditure JE Register should balance to the Paid column on
the Budget Analysis.
Budget Analysis
i-AP/Options/Analysis
Tools/Reports/Budget Analysis
A. Enter 7/1 for the Begin
Date and 6/30 for the End Date.
NOTE: If
payments are dated after 6/30 make sure to extend the End Date to include
them.
B. Leave the Classification
Bolding Selection empty.
C. Leave the Print Detail
box blank.
D. On the Grouping and
Printing Choices, choose the following:
Dimension |
Group
Order |
Total |
Bold |
Page
Break |
Filter |
Fiscal
Year |
1 |
 |
|
|
Enter
the FY |
Fund |
2 |
|
|
|
Enter
the Fund |
Project |
3 |
|
|
|
|
Function |
NA |
|
|
|
|
Object |
NA |
|
|
|
|
Program |
NA |
|
|
|
|
Subject |
NA |
|
|
|
|
JobClass |
NA |
|
|
|
|
Unit |
NA |
|
|
|
|
E. Click Print to export
the Budget Analysis to PDF. Print and retain for records.
F. Save the PDF to the
current year’s historical folder using the file name: Fund XX Budget Analysis
(i.e., Fund 60 Budget Analysis).
G. Print for all Cash/Activity
Funds.
v The Encumbered Column
should balance to the Encumbrance Register plus Expenditure JE Register.
v The Encumbered Column
should balance to the Purchase Order Register plus Expenditure JE Register.
v The Paid column should
balance to the Payment Register plus Expenditure JE Register.
v The Encumbered Balance
column should balance to the Unpaid Encumbrance Register.
Oklahoma Expenditure
Reporting
Prior to submitting
final Oklahoma Expenditure amounts to the state and after balancing is
complete for all funds (including Cash/Activity Funds), it is important
to check for negative errors in the data one final time. Then make final
Oklahoma Revenue Reporting files and save for data retention and submission
to the state.
i-AP/Options/Federal/State
Reports/Oklahoma Expenditure Reporting
A. Enter the appropriate
Cash/Activity Funds.
B. Enter the Payment Date
of 6/30 or final payment date to include all expenditures for the fiscal
year.
C. Enter the File Name.
D. Click Print to export
the Oklahoma Expenditure Reporting to PDF and check for errors. Correct
any negative errors before proceeding. If no errors, save the PDF to the
current year’s historical folder using the file name: Fund XX Oklahoma
Expenditure Reporting (i.e., Fund 60 Oklahoma Expenditure Reporting) and
retain for records.
E. Verify the totals before
submitting to the state.
F. Once balancing is complete,
notify the Encumbrance Clerk so a full Oklahoma Expenditure Reporting
file can be run for the district to include all funds.
DATA
MERGING NOTE: Customers that use
an outside Encumbrance Clerk or customers that do not have complete Fiscal
Year expenditures entered in MAS for all funds may need to merge their
expenditure files before submission to OCAS. Please contact a MAS Support
Representative for assistance with merging expenditure files.
4. Data to verify
– Treasurer
Payment Register
Verify that all payments
have been registered by running the Payment Register report and looking
at the Date Registered column for any unregistered payments.
i-TR/Options/Reports/Payment
Register
A. Select the appropriate
Cash/Activity Fund.
B. Enter 7/1 for the Begin
Date and 6/30 for the End Date.
C. Check the Print Payroll
Payments box.
D. Print for all Cash/Activity
Funds.
E. If any payments have
not been registered, follow the Register Payments steps below.
Register Payments
Register all payments
before balancing funds so that the report totals will balance. If all
payments have been registered, skip this step.
i-TR/Options/Register
Payments
A. Select the appropriate
Cash/Activity Funds.
B. Enter the Registration
Date.
C. Select the appropriate
Account.
D. Enter the Begin Date
and End Date of the payments.
E. Click Process and then
Click Continue to register payments.
F. Register Payments for
all Cash/Activity Funds.
5. Tasks to perform
– Treasurer
Lapsed
Appropriations & Estopped Payments
Before
creating the Oklahoma Revenue Reporting file, enter any adjusting entries
or receipts needed to bring forward any lapsed appropriations or estopped
payments from prior year(s). If no entries are needed, skip this step.
NOTE:
We have created training videos to assist with completing these entries.
Ø How To Enter AF Lapsed
Appropriations (access video directly
through the application: i-TR/Home Screen/
Training
Videos Link/Ctrl+F keys/Search for ‘AF Lapsed Appropriations’)
Ø How To Enter AF Estopped
Payments (access video directly
through the application: i-TR/Home Screen/
Training
Videos Link/Ctrl+F keys/Search for ‘AF Estopped Payments’)
Balance
final bank statement(s) to the following reports:
Cash Balances
i-TR/Options/Reports/Cash
Balances
A. Enter 6/30 for the As
of Date.
B. Enter the current Fiscal
Year.
C. Enter the Cash/Activity
Fund.
D. Leave Account Nos blank.
E. Select all Account Types.
F. Print and Save the Report.
Balance
Sheet
i-TR/Options/Reports/Balance
Sheet
A. Enter 6/30 for the As
of Date.
B. Enter the current Fiscal
Year.
C. Enter the Cash/Activity
Fund.
D. Check the Fund Subtotal
checkbox.
E. Print and Save the Report.
Revenue/Expenditure
Summary
i-TR/Options/Reports/Revenue/Expenditure
Summary
A. Select the appropriate
Cash/Activity Funds.
B. Enter 7/1 for the Begin
Date and 6/30 for the End Date.
C. On the Grouping and
Printing Choices, choose the following:
Dimension |
Group
Order |
Total |
Page
Break |
Filter |
Project |
1 |
|
|
|
Program |
NA |
|
|
|
Unit |
NA |
|
|
|
D. Print and Save the Report.
E. Print for all Cash/Activity
Funds.
v The Beginning Balance
column will be zero from the start date of the report.
v The Receipts column
total should balance the Receipt Register total for the dates specified.
v The Adjusting Entries
column will total any adjusting entries entered for the dates specified
and will include beginning balances.
v The Payments column
total should balance to the Payment Register total for the dates specified.
v The Cash End Balance
column totals the sum of the Beginning Balance, Receipts and Adjusting
Entries columns minus the Payments column and should balance to the Cash
Balance Report.
v The Unpaid POs column
total should balance to the Unpaid Encumbrances report run from i-AP for
the dates specified.
v The End Balance column
totals the Cash End Balance column minus the Unpaid POs column.
Perform Edit Checks
Use the Perform Edit
Checks tool to correct any potential coding issues prior to uploading
a trial submission of the data to OCAS. If there are errors, correct them
before proceeding.
i-TR/Options/Tools/Perform
Edit Checks
A. Leave the Classification
and Account Bolding Selections set to STATE.
NOTE:
Make any necessary corrections to the STATE bolding criteria as needed
in order to stay current with reporting requirements. (Options/Setup/Account
Bolding)
B. Check the appropriate
Edit Checks box to apply the current fiscal year edit checks.
C. Click Perform Checks.
D. Click the Export icon
to export the results to PDF and print the report. Correct errors as necessary.
Oklahoma Revenue Reporting
Trial Submission
NOTE:
Verify the Oklahoma Revenue Report does not contain negative errors (the
text will be red in the report if negative). If there are errors, correct
them before proceeding. It is important to upload a trial submission of
the data to OCAS in order to correct any coding issues before printing
final state reports.
i-TR/Options/Reports/Oklahoma
Revenue Reporting
A. Enter the Cash/Activity
Fund.
B. Enter the File Name.
C. Print the Report and
check for errors. Correct errors as necessary.
D. Click Create File and
save file for testing. Upload the file to OCAS and correct errors as necessary.
REMINDER: Do not submit reports to the auditor until completely
verified/balanced in all applications. Make sure to keep copies for the
district and auditor, then create OCAS files for state financial reporting.
IMPORTANT: DO NOT ADD OR EDIT ANY DATA AFTER REPORTS ARE CREATED
AND SENT TO THE AUDITOR.
6. State Reports
to verify and print – Treasurer
In
addition to a hard copy of the reports required by State Statute, the
Board of Education and Auditor, it is important to also save a PDF digital
copy of these reports.
For
records retention at your district, a historical folder should be created
locally for storage of the current school year’s digital copies. This
will provide your district an easy way to reference this historical information
in the future. See ‘Example of Historical folder’ on last page. IMPORTANT:
The historical folder should be secured by the network administrator,
giving access only to the appropriate users.
NOTE: Run each report
for all applicable funds.
Receipt
Register
i-TR/Options/Reports/Receipt Register
A. Select the appropriate
Cash/Activity Funds.
B. Remove the checkmark
on Include Details.
C. Enter 7/1 for the Begin
Receipt Date and 6/30 for the End Receipt Date.
D. Check the Select All
Accounts box.
E. Click Print to export
the Receipt Register to PDF. Print and retain for records.
F. Save the PDF to the
current year’s historical folder using the file name: Fund XX Receipt
Register (i.e., Fund 60 Receipt Register).
G. Print for all Cash/Activity
Funds.
Payment
Clearing Register
i-TR/Options/Reports/Payment Clearing Register
A. Select the appropriate
Cash/Activity Funds.
B. Remove the checkmark
on Include Details.
C. Enter 7/1 for the Begin
Payment Clearing Date and 6/30 for the End Payment Clearing Date.
D. Check the Select All
Accounts box.
E. Click Print to export
the Payment Clearing Register to PDF. Print and retain for records.
F. Save the PDF to the
current year’s historical folder using the file name: Fund XX Payment
Clearing Register (i.e., Fund 60 Payment Clearing Register).
G. Print for all Cash/Activity
Funds.
v The total of the current
year Payment Clearing Register plus the current year Outstanding Payments
should balance to the current year Payment Register.
Payment Register
i-TR/Options/Reports/Payment
Register
A. Select the appropriate
Cash/Activity Funds.
B. Enter 7/1 for the Begin
Date and 6/30 End Date.
C. Check the Print Payroll
Payments box.
D. Click Print to export
the Payment Register to PDF. Print and retain for records.
E. Save the PDF to the
current year’s historical folder using the file name: Fund XX Payment
Register TR (i.e., Fund 60 Payment Register TR).
F. Print for all Cash/Activity
Funds.
v The current Payment
Register should balance to the current Payment Clearing Register plus
the current Outstanding Payments.
Outstanding Payments
i-TR/Options/Reports/Outstanding
Payments
A. Enter 6/30 for the As
of Date.
B. Leave Fiscal Years blank.
C. Enter the Cash/Activity
Fund.
D. Click Print to export
the Outstanding Payments to PDF. Print and retain for records.
E. Save the PDF to the
current year’s historical folder using the file name: Fund XX Outstanding
Payments (i.e., Fund 60 Outstanding Payments).
F. Print for all Cash/Activity
Funds.
Cash Balances
i-TR/Options/Reports/Cash
Balances
A. Enter 6/30 for the As
of Date.
B. Enter the current Fiscal
Year.
C. Enter the Cash/Activity
Fund.
D. Leave Account Nos blank.
E. Select all Account Types.
F. Click Print to export
the Cash Balances to PDF. Print and retain for records.
G. Save the PDF to the
current year’s historical folder using the file name: Fund XX Cash Balances
(i.e., Fund 60 Cash Balances).
H. Print for all Cash/Activity
Funds.
Balance
Sheet
i-TR/Options/Reports/Balance
Sheet
A. Enter 6/30 for the As
of Date.
B. Enter the current Fiscal
Year.
C. Enter the Cash/Activity
Fund.
D. Check the Fund Subtotal
checkbox.
E. Click Print to export
the Balance Sheet to PDF. Print and retain for records.
F. Save the PDF to the
current year’s historical folder using the file name: Fund XX Balance
Sheet (i.e., Fund 60 Balance Sheet).
G. Print for all Cash/Activity
Funds.
Revenue/Expenditure
Summary
i-TR/Options/Reports/Revenue/Expenditure
Summary
A. Select the appropriate
Cash/Activity Funds.
B. Enter 7/1 for the Begin
Date and 6/30 for the End Date.
C. On the Grouping and
Printing Choices, choose the following:
Dimension |
Group
Order |
Total |
Page
Break |
Filter |
Project |
1 |
|
|
|
Program |
NA |
|
|
|
Unit |
NA |
|
|
|
D. Click Print to export
the Revenue/Expenditure Summary to PDF. Print and retain for records.
E. Save the PDF to the
current year’s historical folder using the file name: Fund XX Revenue_Expenditure
Summary (i.e., Fund 60 Revenue_Expenditure Summary).
F. Print for all Cash/Activity
Funds.
Revenue/Expenditure
Detail
i-TR/Options/Reports/Revenue/Expenditure
Detail
A. Select the appropriate
Cash/Activity Funds.
B. Enter 7/1 for the Begin
Date and 6/30 for the End Date.
C. On the Grouping and
Printing Choices, choose the following:
Dimension |
Group
Order |
Page
Break |
Filter |
Project |
1 |
|
|
Program |
NA |
|
|
Unit |
NA |
|
|
D. Check the Page Break
box to print each Project/Program on separate pages.
E. Click Print to export
the Revenue/Expenditure Detail to PDF. Print and retain for records.
F. Save the PDF to the
current year’s historical folder using the file name: Fund XX Revenue_Expenditure
Detail (i.e., Fund 60 Revenue_Expenditure Detail).
G. Print for all Cash/Activity
Funds.
v The Cash End Balance
on this report should balance to the Cash End Balance on the Revenue/Expenditure
Summary.
v The Accrual End Balance
on this report should balance to the End Balance on the Revenue/Expenditure
Summary.
Oklahoma Revenue Reporting
Prior to submitting
final Oklahoma Revenue amounts to the state and after balancing is complete
for all funds (including Cash/Activity Funds), it is important to check
for negative errors in the data one final time. Then make final Oklahoma
Revenue Reporting files and save for data retention and submission to
the state.
i-TR/Options/Reports/Oklahoma
Revenue Reporting
A. Enter the Cash/Activity
Fund.
B. Enter the File Name.
C. Click Print to export
the Oklahoma Revenue Reporting to PDF and check for errors. Correct any
negative errors before proceeding. If no errors, save the PDF to the current
year’s historical folder using the file name: Fund XX Oklahoma Revenue
Reporting (i.e., Fund 60 Oklahoma Revenue Reporting) and retain for records.
D. Verify your totals before
submitting to the state.
E. Once balancing is complete,
notify the Treasurer so a full Oklahoma Revenue Reporting file can be
run for the district to include all funds.
DATA MERGING NOTE:
Customers that use an outside Treasurer or customers that do not have
complete Fiscal Year revenue entered in MAS for all funds may need to
merge their Revenue files before submission to OCAS. Please contact a
MAS Support Representative for assistance with merging revenue files.
Example
of Historical Folder for Records Retention: